

This is my tutorial on how to turn raw pork into pulled pork sandwiches.
Rather than making this a quick and short guide I want to go more in depth for those of you new to smoking meats and trying to achieve that fall off the bone pulled pork. When I started smoking meats for the first time there was a lot of trial and error and I never felt like cooking tutorials went into enough detail for me to have success without a lot of failures first.
Here’s a basic overview of the process:
Step 1: Trim the meat
Step 2: Brine the meat
Step 3: Dry & Season the meat
Step 4: Smoke the meat
Step 5: Wrap the meat & slow cook it
These cooking instructions should get you the perfect juicy pulled pork, even if it’s your first time.
This is the video of the whole cooking process from start to finish. The written guide will continue on below the video:
Do you have your meat ready to go? Maybe you haven’t gone to the store yet to get your meat. Maybe you don’t know what meat to buy? For pulled pork there’s essentially 2 cuts I work with… the boston butt or the pork shoulder. I like to buy bone-in cuts, but it’s ok if your butcher removed the bones already.
Alright you have your meat. Time for the fun to begin
Step 1: Trim the meat
If your pork shoulder still has the skin on it trim it off. Trim off any excess amounts of fat.

I don’t go crazy trying to cut off every piece of fat I see. Usually I find the major fat areas on the surface, give it a few slices with my knife and then we are good to go. Generally when I am done trimming my pork it will look like this:

Good work! Ok your meat is ready. Time to brine it
Step 2: Brine the meat
When I first started smoking meats I did not brine my meat before putting them in the smoker. I remember reading something about brining meats and decided to try it a long time ago. It was amazing and since that day I always brine any meat I plan on smoking.
In the most simple terms, brining is soaking your meat in a salty solution for 12-48 hours.
Brining meat denatures the proteins inside the meat allowing it to retain more moisture, which is essential for some JUICY pulled pork sandwiches. It also adds flavor throughout the entirety of the juicy slab of pork.
I fill a 5 gallon bucket with enough water that would completely be able to submerge my meat when placed into the brine. Then I create my brine solution which consists of 1 part salt and 1 part sugar.
So if I use 2 cups of Salt I will also use 2 cups of Sugar.

First I start by adding salt to my water. Any easy way to tell if you have enough salt in your brine is by putting an egg in the water with your bucket. Add more salt, stir and let it dissolve a bit. Keep repeating this process until the egg floats.

Once your egg is floating you know you have enough salt!
Typically for a large boston butt 10lb+ 4-5 inches of water in the bucket should be plenty to fully submerge it and 2-3 cups of salt should be plenty. I tend to eyeball everything when cooking and rarely ever measure anything out.
When your salt levels are good it’s time to add some sugar!
If I used 2 cups of salt I’m going to use 2 cups of sugar. And I like to use brown sugar and white sugar. So I will add a cup of each type. And I’m left with a sweet and salty brown colored brine:

Now add your meat into the brine.
You’ll notice in the picture below I added the boston butt and also a turkey. I won’t talk about the turkey in this tutorial but it turned out great and if you want to see how the turkey came out you can see it in the video at the start of this tutorial.

You’ll notice that your meats float. Leaving part of the meat exposed to air
I suggest using a plate or something heavy to put in the bucket on top of your meat to keep it completely submerged in the brine.
Put the brine bucket with your pork into a fridge for 12-24 hours.
I have brined my meats for as long as 48 hours and they still turn out great. Sometimes if I have a fishing trip or something comes up that I just can’t pass up I’ll delay my pulled pork sandwiches another day and keep the meat in the brine one more day.
If your fridge doesn’t have room for a 5 gallon bucket, I have had success in the past just pouring a bunch of ice into the bucket. My buckets of brine topped off with ice, kept indoors and then covered in a few towels will usually keep ice frozen for 24 hours.
As you progress as a smoke master and want to start getting more creative with your flavors, the brine is a great place to experiment around with seasonings and flavor combinations.
Step 3: Dry & Season the meat
Whether you brine your meat for 12 hours or 48 hours, once you pull out the meat you need to dry it off with paper towels.
You do not want to season a wet piece of meat. The seasoning won’t ‘stick’ to the meat properly when it’s wet. So pat it with paper towels.

Ok, it’s dry! Time to season the meat!
I put my meat in an aluminum tray when I add the seasonings, this way the seasoning that doesn’t stick to the meat will fall into the tray where it will find some use later on in this tutorial.
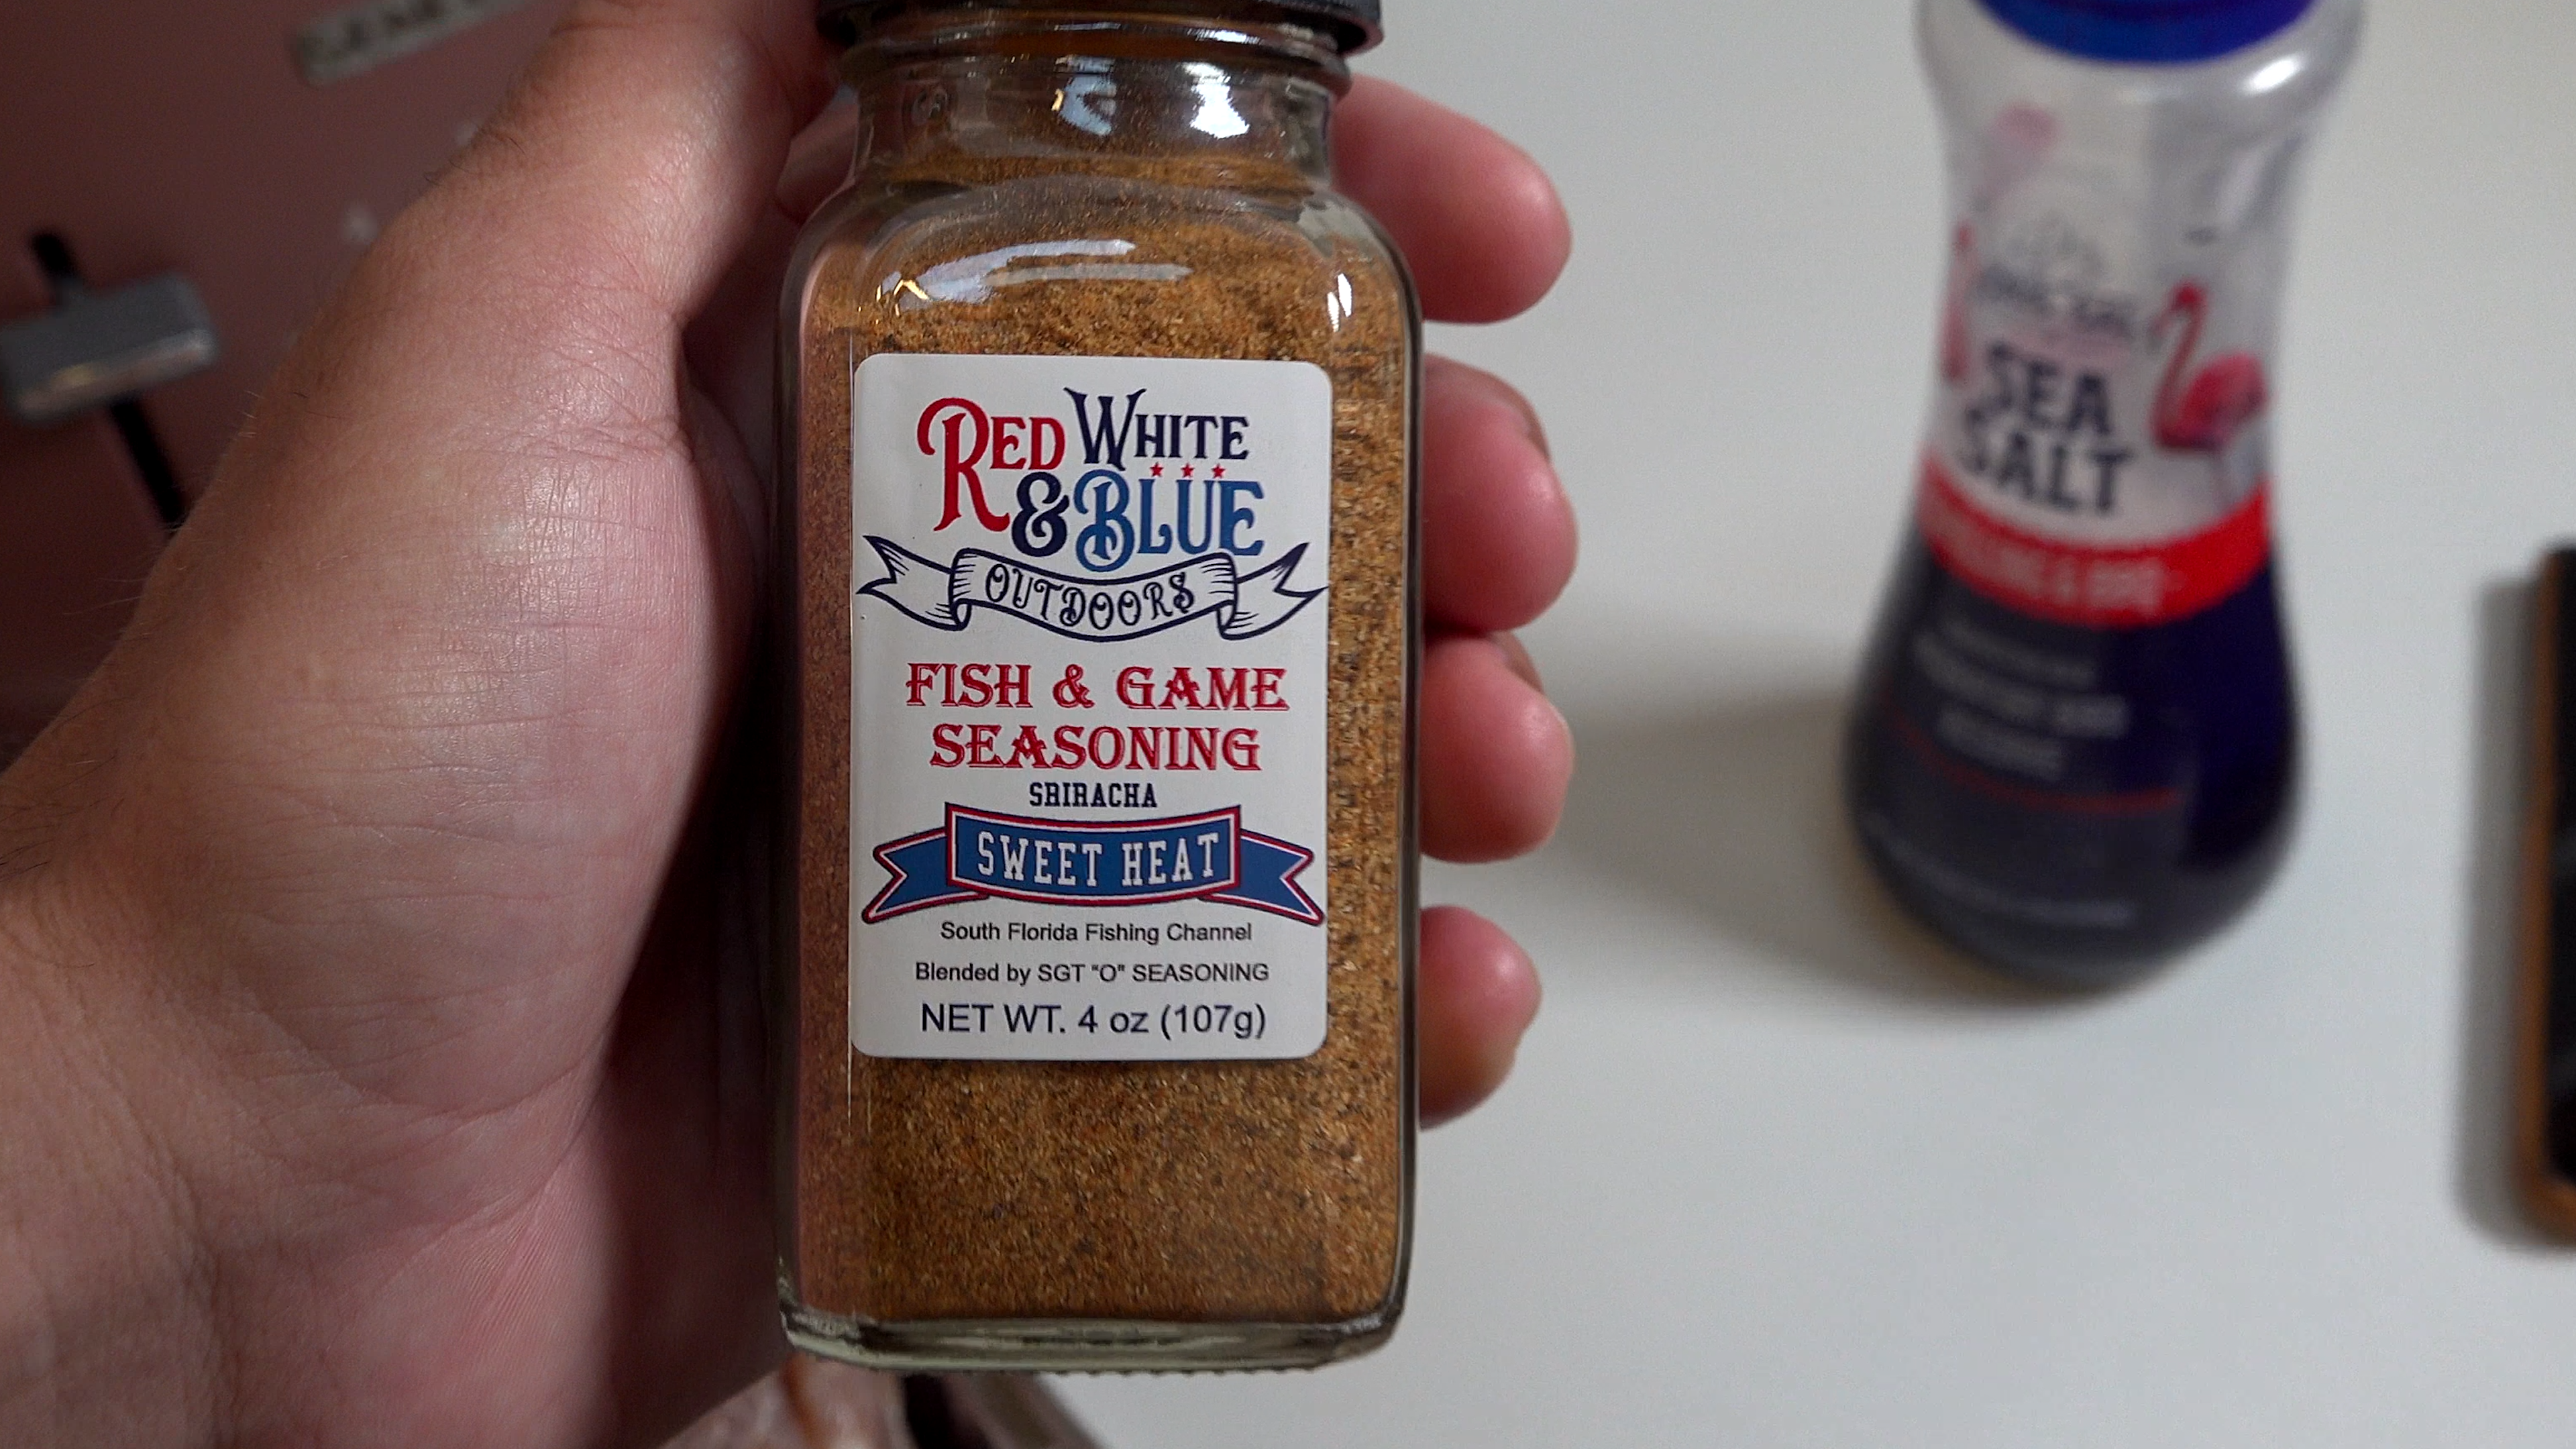
For this Sweet Heat Reaper Pulled Pork recipe I will be using 2 different seasonings. First a very generous layer of RWB Outdoors Sweet Heat and then a second layer of The Reaper. Depending how spicy you want your pulled pork will depend how much of The Reaper you use. (I use a lot!)


I like to use A LOT of seasoning when making pulled pork. The more seasoning you use the nicer of a ‘crust’ you can form on the meat. And it’s one of the best things I have ever tasted. Here’s some pics of what my fully seasoned meat looks like:


Step 4: Smoke the meat
Take your seasoned meat and throw it in the smoke!
Let’s talk about the smoker for a moment. At the end of the day it doesn’t matter what you are using to smoke your meat. The most important thing is temperature. I try to keep my temperature right at 170 degrees. If it’s lower that’s totally ok too. But I never want it to be higher.
I am using a Traeger Pellet smoker. It automatically pours wood into the burner to produce smoke. This way I can set it to smoke at 170 degrees and I can leave it alone for 6 hours.
What wood should you use with pulled pork? I personally LOVE cherry wood

This is a bag of cherry wood pellets that I will be using in my smoker. It is a soft and sweet smoke with a bit more flavor than Alder. Alder wood is very light and great for fish. Woods like Mesquite and Hickory are much more flavor intense and strong and usually what I use with ribs or fat steaks. I find cherry wood to be a perfect balance of flavor and smoke to handle the pork.
Turn your smoker on and wait for it to start smoking. If you’re in a hurry you can smoke at higher temps like 220. Then smoking may only take 3-4 hours instead of 6 hours at 170, but I’m a low and slow kinda guy. So I have smoke coming out at 170, time to slap on the meat:

That is the turkey on the left that I am also smoking with my boston butt.

I spend the next 6 hours watching boats drive by and enjoying a cold one. Just kidding! I wish! I was editing videos for the South Florida Fishing Channel. I’ll have a cold one when the meat is done!
After 6 hours of smoking it’s time to wrap it… We’re almost done!
Step 5: Wrap the meat & slow cook it
Your meat has been smoking for 6 hours now. There should be a real good smoke line on it already. It’s time to take the meat off the smoker and back into that aluminum tray we seasoned it in earlier.

Add a bit less than half an inch of apple juice into the tray. This will help keep the pork moist when slow cooking and enhance the sweetness which will pair super well with the heat from The Reaper.
Now cover the tray and meat with foil and put it on fairly tight

Now crank your oven or smoker up to 250 and put your meat back on it. The meat will be slow cooking wrapped up for another 4 hours. You could even go lower in temp, like 225 for 6 hours.

I would suggest checking on the meat every couple hours. Life the foil up and use a fork to pull on the meat a bit. If it falls apart with very little effort, you know you’re done! In my case on this cook I took it off after 4 hours cooking at 250.
After brining for 24-36 hours, smoking for 6 hours at 170 and then slow cooking wrapped in foil with apple juice at 250 for 4 hours… THIS is what you get:

With little effort the meat almost starts falling apart on its own when running a fork through it.


The red smoke lines pop out in all it’s beauty letting the consumer of this juicy meat know how much love was put into it during the smoking process.
Slap a pile of this Sweet Heat Reaper pulled pork on your bun and then add some BBQ sauce. In the case of this recipe you can spoon the juices from inside the aluminum tray as a sauce. It’s full of flavor, has a kick and will make your pulled pork sandwich SUPER MOUTH WATERING!

I also love Carolina Tangy Gold sauce with my pulled pork sandwiches. I guess what sauce you want to use really depends on you! Don’t let anyone else tell you what’s right and what’s wrong. We all have different taste buds.

I hope this cooking tutorial helped you make your first Sweet Heat Reaper pulled pork sandwiches!
You can help support more tutorials like this by getting yourself some of the Red White and Blue Outdoors Sweet Heat and Reaper Seasonings!
Be sure to bookmark and save this page so you can always come back to it. Share it with your friends and set a BBQ day to fire up the smoker with some buddies